Creating a Kindle Sketchbook is so easy, I don’t know why more artists are not creating them. Personally, I love buying art books and sketchbooks. I actually prefer sketchbooks, because in the simple line work, I tend to discover an artist more than in his/her finished — perfected — pieces. I love them so much, that I have run out of shelf space. There are books stacked atop my furniture all over my room! With Disney’s $250 Sketchbooks sold out, I’m sure I’m not alone in this obsession.
In this blog post, I’ll show you how you can produce your own Sketchbook (or “Art of” book) and publish it on Amazon’s KDP. Note: You can click on the image to view a larger image.
Step 1. Plan. Collect and Scan Your Art.
Decide what your sketchbook will be about. You can have a generic Adam’s or Eve’s Sketchbook Series, where you publish a bunch of your favourite sketches on any topic. Or you can have a theme; Adam’s Ladies or Eve’s Weapon Collection.
How many pages should your sketchbook be? The more pages, the larger the file. I would recommend seeing what other artists are doing, in print and digitally. This research will help you decide on how much you should price your book, too. Personally, I think it is better to have shorter sketchbooks with an affordable price, than a single massive sketchbook that will sit on a virtual shelf forever.
Once you have collected all the art for your sketchbook, you need to scan it at 600 ppi resolution. Make sure you wipe your scanner before scanning to avoid spots on your images. You always want to scan your drawing bigger than what you think they will be in the end. Just in case you need to enlarge your images.
Step 2. Photoshop (or another image editor)
Kindle Sketchbooks are Fixed-Layout Books. You’ll need to decide if you want your sketchbook to have a vertical (Portrait) or horizontal (Landscape) layout. Then you need to create a new file with the following resolution: 2400 x 3840 px. This resolution is what is currently suggested in Amazon’s Kindle Kids’ Book Creator User Guide. If they change this resolution in the future, you will need to change your own files accordingly.
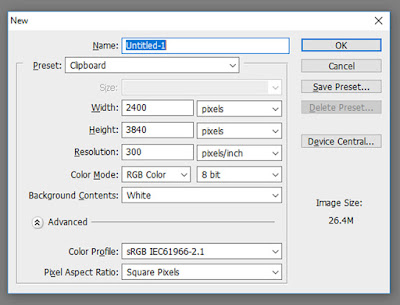 |
| These are the settings in Photoshop for the new file. |
Add your sketches to the new image file. For the purpose of this article, I’m going to assume you know how to do this.
Name your pages sequentially. This is very important! It will save you time importing your files. I tend to name my files: NameOfBook_Page00A (this is the front matter — the stuff that comes before the sketchbook, such as Preface, Instructions, and Title Page — the letter increases accordingly). The actual sketchbook pages (the meat of the book) I name: NameOfBook_Page01 (increasing the number accordingly—if the book had more than 99 pages, I would name my book NameOfBook_Page001).
Save your files as PSD, until the final version. Then you’ll need to flatten your images and save them as PDFs or JPEGs. If you’ve named your files sequentially, all of your sketchbook pages will be in their proper order.
Preface and Front and Back Matter
If you look at any professional sketchbook, there are always a few pages in the beginning explaining what the sketchbook is about and/or why it was created. This is known as the Preface. If you want your preface in color, or with specific text design, you will need to create this text file in Photoshop and save it as another of the images.
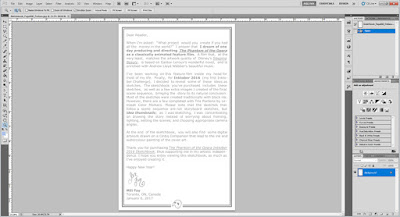 |
| This is the Preface page I created in Photoshop for The Phantom of the Opera Inktober 2016 Sketchbook. |
If you just wish to create a plain text preface, you can do that in the Kindle Kids’ Book Creator. It’s completely up to you.
You may also wish to create a Copyright Page and Author’s Bio Page, to make your book appear more professional. I would place these pages at the end, so that Amazon’s Look Inside feature does not show them to the public.
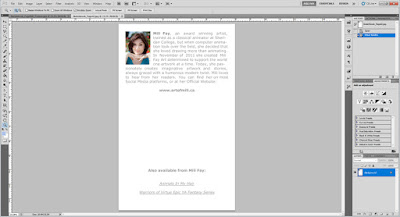 |
| My Author's Bio Page |
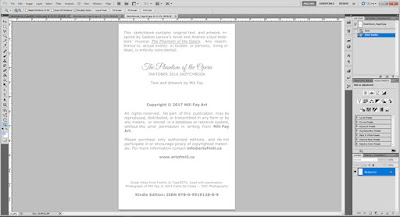 |
| My Copyright Page |
If you are Canadian, you can register as a Publisher and receive free ISBN numbers from Library and Archives Canada. Do this if you are a professional, intending to sell a lot of sketchbooks. If you are American, you will need to purchase your ISBN.
Once all of your pages are saved as flattened JPEG files, it’s time for you to build your book in Kindle Kids’ Book Creator.
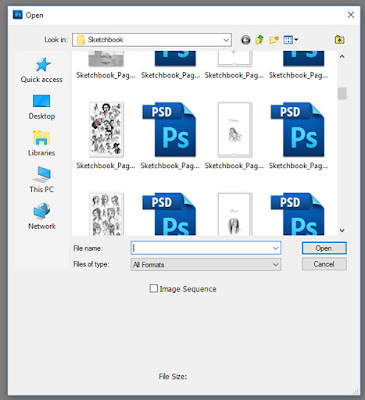 |
| These are my flies ready for Kindle Kids' Book Creator. You can see the JPEG and the PSD versions side by side. |
Step 3. Kindle Kids’ Book Creator
Download the free Kindle Kids’ Book Creator from Amazon. Install.
In the Welcome Screen choose: Create a New Kids’ Book.
Read the Getting Ready instructions.
Fill out the details about your book.
Choose orientation Landscape (Horizontal) or Portrait (Vertical).
Import your Cover Art (my cover art is the same size as the inside art).
Select and import all the pages of your sketchbook, excluding the Cover Art.
Your book has successfully imported. You may wish to change the Zoom percentage from 100% to 50%.
If you have tiny text that will be invisible on a smartphone (remember a lot of users read books on their smartphones), you may wish to insert a Pop-up. Click on the Add Pop-Up button in the upper left-hand corner of your screen.
By clicking on the frame, and hovering over the frame, you will see your cursor change to four-directional arrows. Now you can move the Pop-up over your text. Adjust it to the size of your text by hovering over corners or sides, until the cursor changes to a single directional arrow.
By hovering above the Pop-Up frame, you will bring forth “View Pop-Up” gray tab. Click on it.
Now you can add text, and use the features in the top bar to choose the size and spacing of your text until you feel it is large enough to be easily read on a smartphone screen.
You can add pages and delete pages by clicking on the Add Page and Delete Page buttons. Once you feel your book is ready to be published go to Book Preview > Create Book Preview (You’ll need to install the Kindle Previewer if you have not done so already when you installed the Book Creator.).
This will create a preview of your book for testing.
In the Kindle Previewer test your book. Does it look as it should? Does double-clicking on the small text reveal the Pop-Up window? Etc.
If you like you can crate an AZK file to test your book on your iOS devices. In the Kindle Previewer choose Devices > Kindle for iOS.
You can upload your AZK file by selecting your device in iTunes (you need to have the Kindle App on your device), going to
Apps > Kindle, and adding the file to your Kindle app.
If your book looks great and you are ready to publish it on KDP, in the Kindle Kids’ Book Creator (with your book open of course) click File > Save for Publishing.
Name and save your book wherever you like.
Kindle Kids’ Book Creator will inform you when it has finished your file.
Find the file where you’ve saved it. It will be a .mobi file with the name you gave it. This is the file you will upload to KDP when prompted. (Note: content.mobi file you see in this window is the file created by the Kindle Previewer, the one you used to preview your book).
Step 4. Publish your book on Amazon.
To publish your book on Amazon, you will of course need to create an Amazon account. If you wish, you can create a separate account for producing Kindle books, from the one you use to purchase books.
Once you have your
Amazon Account go to
https://kdp.amazon.com.
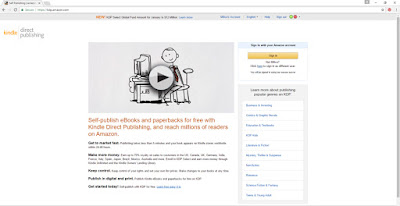 |
| KDP Welcome Page |
Sign in and follow the instructions to publish your Kindle Sketchbook.
That’s all there is to publishing a sketchbook. Let me know in the comments if you have any questions. If you wish, let me know when you’ve created your own sketchbook. I may like to add it to my collection.
All the best!
Mili
 |
| © 2014 CDC Photography |
Mili Fay, an award winning artist, trained as a classical animator at Sheridan College, but when computer animation took over the field, she decided that she loved drawing more than animating. In November of 2011 she created Mili Fay Art determined to support the world one artwork at a time. Today, she passionately creates imaginative artwork and stories, always graced with a humorous modern twist.
Currently, Mili is working on an epic YA fantasy series, Warriors of Virtue, about a reluctant princess, Lauraliee Lumijer, who grows into a queen as she defends Ardan from dragon people (people that change into dragons) and a hermit dragon prince, Diamond Pendragon, who is forced to rejoin Ardanian society and reevaluate his convictions.


